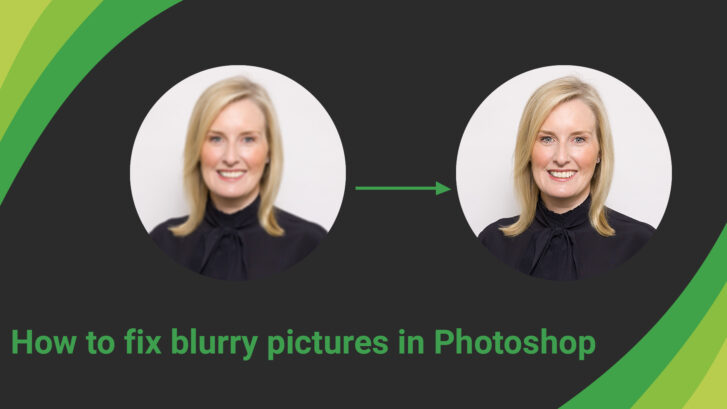
How to fix blurry pictures in Photoshop?
You are in front of a breathtakingly beautiful, scene, a loving moment you wish to capture, or suddenly passing by something that just requires to be captured in a picture. You take the image with your camera, or on your phone, and to your irritation, it might be blurry. You cannot recapture the photo, so your only choice is to fix the blurry photographs.
You can fix blurry pictures in Photoshop and give the images a pro touch. So, without more ado, let us get to learn how to fix blurry pictures.

blurry pictures
Types of Blur:
There are two kinds of blurs that can arise within a photo. The first is with camera movement, wherever the photographer is moving the camera. This might occur when trying to make a panorama, or when you are following a subject that is moving.
The second kind of blur is identified as a subject movement when the static component of a photograph is clear and moving subjects are blurred. This is usually done on purpose for artistic effect but can be an irritation for someone trying to take a fully-focused photograph.
How to Fix a Blurry Photo with Photoshop:

Blurry photographs are not possible to avoid, whether you have shaky hands or not! Luckily, there is a tool that is known as “camera shake reduction,” which might be able to help. The tool identifies any motion in the image and reacts to this effect with a sharpening tool plus “ghost removal.” Remember, there are some restrictions to this instrument. Photographs with a lot of noise or grain would be harder to improve, along with images with low light plus images with a high ISO.
To edit a fuzzy photo with Photoshop, create an identity for your image editing. From the drop-down menu, select Filter>Sharpen>Shake Reduction.
A new dialogue box will open, letting the program scrutinize your photograph and look for any parts of blurriness. The picture will automatically be edited, providing you with a preview of the modifications that have been made. An advanced segment permits you to look at some more advanced options wherever you can change the edits that have been made. A “blur estimation” box will furthermore appear, presenting you with the precise area being edited. You have the choice to move the focus around the photograph to improve blurriness in other areas.
Smart Sharpening with Photoshop:
As another choice for eradicating blurriness, users could use the lasso tool to select a precise part of a photograph for sharpening. When you have a duplicate picture ready for editing, create a second layer on your picture. This will be the layer you will be working with.
Next, select the “lasso” tool as well as trace around the part you want to fix. You will require to click and hold the mouse down to trace the whole image. Do not worry if it is not perfectly accurate! If the part you want to lasso has a clear boundary around it, you might moreover select the polygonal lasso that can make the shape for you. Once you have lassoed the area, you will want to feather to some extent around it. This will confirm that there is not too stark of a contrast between your sharpened image as well as the rest of the photo. In this case, less is more! Only feather as much as you require or else the surrounding area will start to look too soft.
Next, you could go to your drop-down menu and select Filter>Sharpen>Smart Sharpen. Since every photo is dissimilar, the quantity that you sharpen your photograph will be dissimilar every time. Ensure to select the “preview” checkbox in advance, so that you could double-check the photograph beforehand making changes.
It is useful to set the sharpness to the most extreme level and then work your way back from there. This way, you can see how aggressive the image looks against its background as well as find a happy medium.
Additional Tips for Fix Blurry Pictures
Use Layer Masking to Sharpen Only Parts of the Image
If you’re familiar with layer masking, you can use masks to help restrict the unsharp mask. Using the unsharp mask on the whole image can create some unneeded sharpening on soft spots in the image, so using a layer mask can help you to restrict that sharpening. Ideally, you can just sharpen the subject while leaving the background alone.
Don’t Get Too Caught Up Zooming In
Know the intended use of your photo. If you just hope to have a photo that you can post on Instagram or Facebook, it probably isn’t as important that you get rid of so much blur. For this reason, you don’t need to zoom in, or pixel peep, to see the finest details. However, if you hope to print a photo, you may need to be more aggressive about your unsharp mask.
Adjust the Unsharp Mask Settings Carefully on Each Photo
There isn’t a one-size-fits-all solution for the unsharp mask settings. Each and every photo will require different settings. Once you set the amount and threshold, adjust the radius. Once you set up the radius, feel free to go back and adjust the amount to make the sharpening perfectly fit your photo. The only way to make a blurry image even worse is by oversharpening. Remember that the unsharp mask is increasing the contrast of the edges in your photo, so you must be careful not to overdo it.
For Very Low Quality/High Blur Images, Try a Photoshop Plugin
The unsharp mask can only get you so far in the process to fix blurry pictures. If you are editing a seriously blurry image, you may need to use third-party software to try and recover your image. Topaz Sharpen AI is a popular third-party software that uses the power of AI to sharpen your blurry images. Once inside, you have the option to choose how blurry your photo is and adjust a few settings. This software may be overkill for slightly blurry photos, but if you have a serious blur issue that Photoshop can’t seem to fix, the power of AI may be able to help you out.
Once you have got your fuzzy photo sharpened up, you could get ready to print! Whether you are working with colors or grayscales, it’s always perfect to implement the perfect inkjet cartridges for photographs to get the finest result. If you are new to Photoshop, do not be scared to experiment! As long as you are working with duplicates, you could play around with all types of awesome tools to get picture-perfect printed images.
FAQs on Fix Blurry Pictures
Could you fix blurry pictures in Photoshop?
Yes, Photoshop does the finest job of fixing blurry photographs. Blurry pictures are fixed following some simple steps, and there are two different approaches that you can use. The first technique is done using a sharpness tool, as well as the second one is the noise reduction tool in Photoshop.
How do you fix a seriously blurry picture?
If your image is blurry a little or severely, Photoshop could fix it. For improving heavily blurry pictures, you must try the Gaussian blur first and then sharpen the Filter next. After that, adjust the pixels from settings and then decrease the blurriness as per your needs.
Why is Photoshop Blurring my images?
Photoshop never blurred pictures unless it is a raster image. Raster pictures are graphics, and these are generated by pixels only. Thus, if you are stretching it in Photoshop, the outcome will be a more pixelated image.
How do we smooth edges fast in Photoshop?
This issue is directly solved in Photoshop. You have to create a mask first from the selection and go to the “Properties” window choice. You will then find sliders written to upsurge the “Smooth.” Smooth it a little, and the rough edges would look perfect.
Conclusion
Although blur and fuzziness cannot be eliminated 100%, the Photoshop editing methods explained above will make your photographs usable by improving their sharpness. You could apply adjustments like contrast, curves, levels, and vignetting to improve the images further afterward if you have tried any of these techniques. You can finally save all the blurry photographs you previously thought were damaged. You can always get the best photo-editing assistance from a reputable company like Clipping Path Mania